
How to Master the Fundamental Movements

Function is a common term in current physical therapy practice. The definition of functional varies greatly between patients and clients. Being functional is of utmost importance to excellent and comprehensive rehabilitation. The term ‘functional’ is often synonymously used with efficiency, movement competency, and/or movement quality — all of which underpin successful movement. In this case, we define ‘successful movement’ as the movement that does not cause immediate (acute) pain or contribute to deficiencies in which pain may eventually occur over time.
A commonly held belief in physical therapist circles is that you can overcome pain and its precursors by learning how to move properly with good form and technique. In this sense, learning the fundamental movement patterns in push, pull, hinge, squat, lunge, and rotation appear to be essential in maintaining functional movement and managing (or reducing/ eliminating) pain. Here, we explore the various fundamental movements and how to master them.
1. Push / Pull
Most of your daily movements come from the ability to either push or pull something. Opening and closing doors, getting up from the floor, or helping someone off the ground are just some examples where you need to use either pushing or pulling techniques.
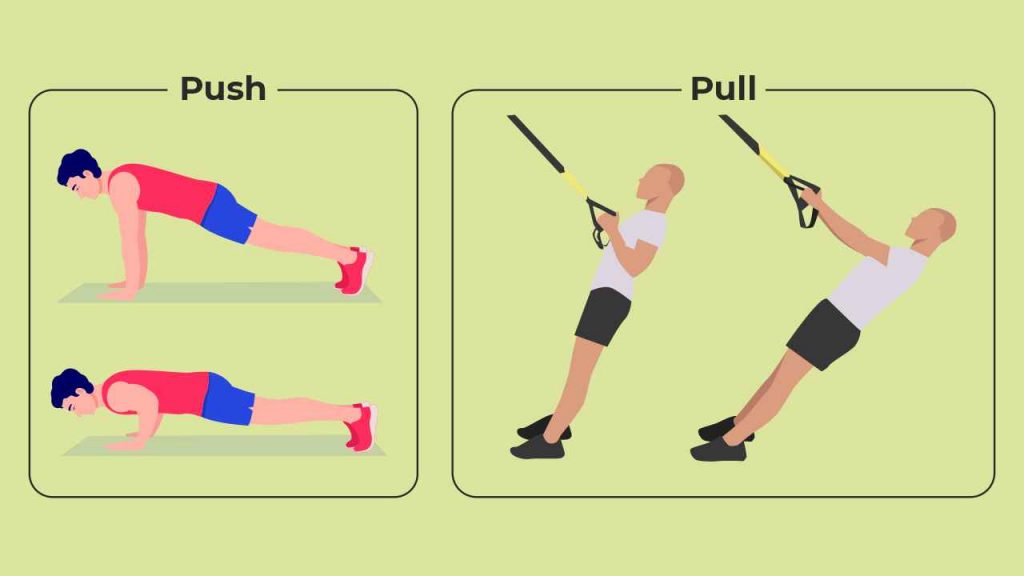
Figure 1 breaks down the push and pull motions of the upper body and lists the key joints and muscles involved in each action.
| Push | Pull | |
| Muscles | 1. Pectoralis major 2. Triceps 3. Anterior deltoid | 1. Latissimus dorsi 2. Biceps 3. Rhomboids |
| Joints | 1. Shoulder flexion 2. Elbow extension | 1. Shoulder extension 2. Elbow flexion |
Figure 1. Push and pull key muscles and joint actions
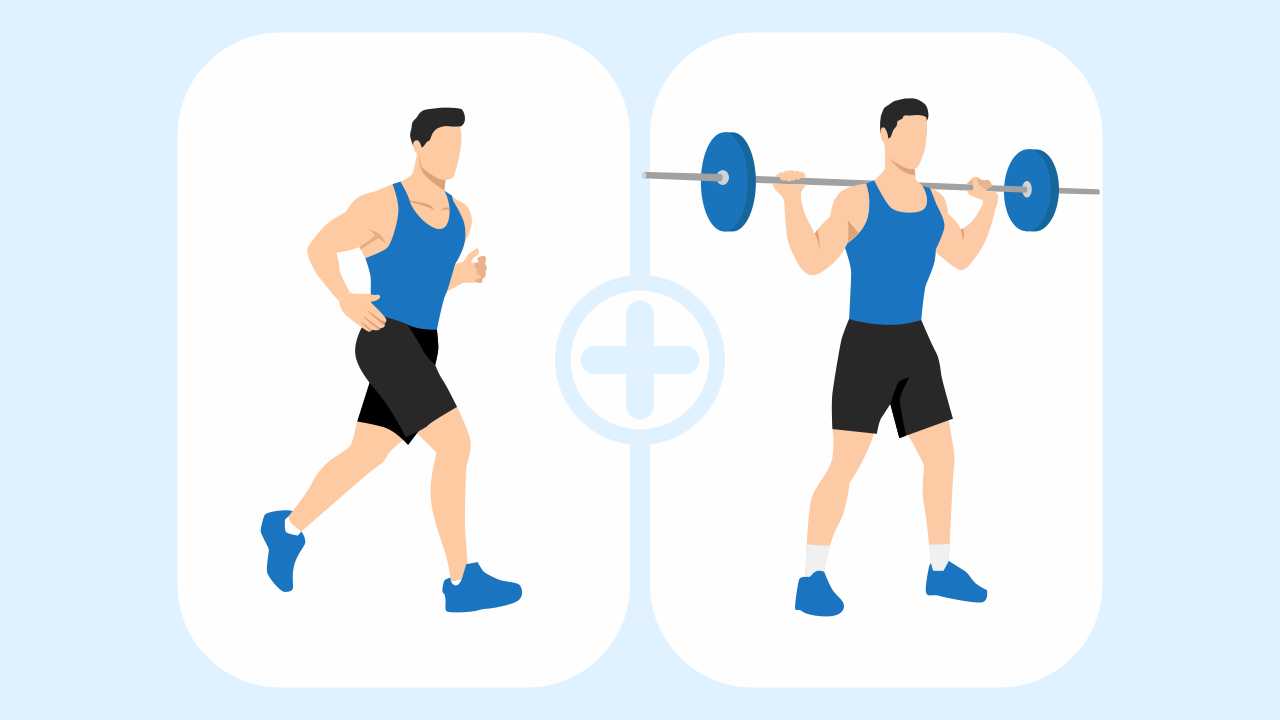
In resistance training, the goal should always be to move proficiently without pain before progressing to external resistance-based activities. In this case, starting with bodyweight push-ups, and inverted rows using a TRX can be highly beneficial before progressing to bench press, dumbbell chest press, seated cable, or barbell bent-over rows.
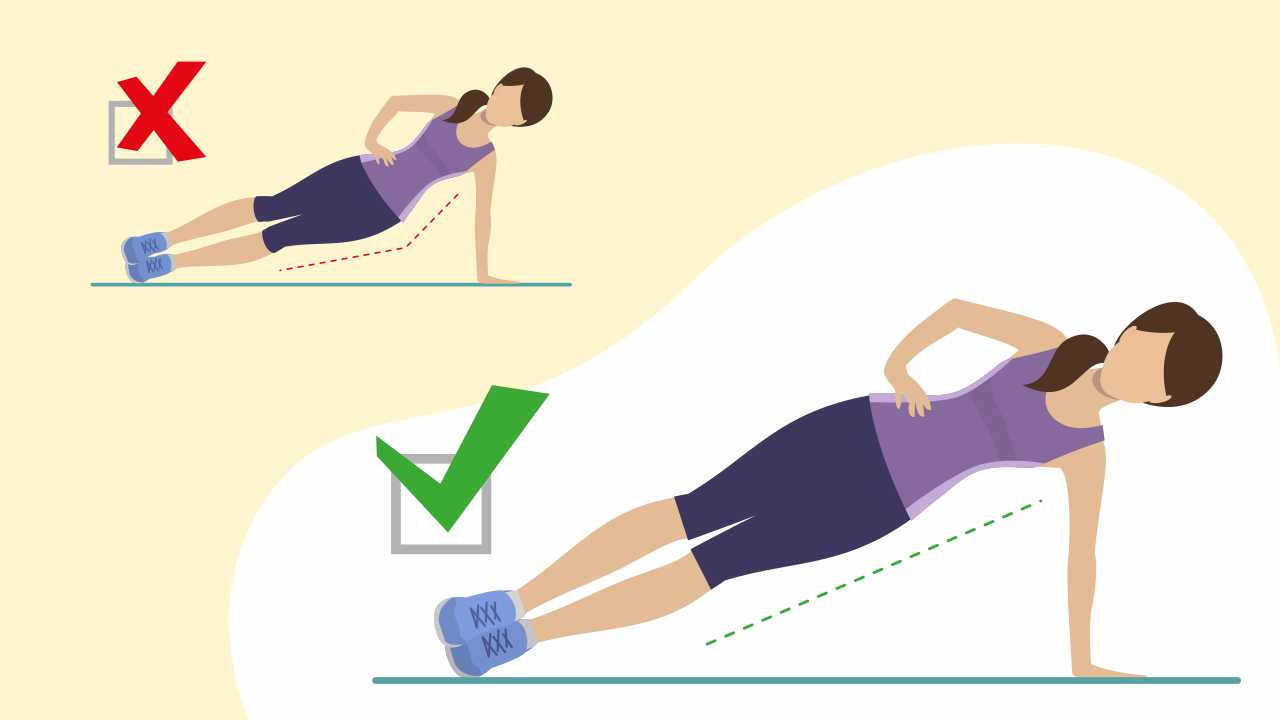
While performing these movements, you need to keep a neutral spine position, stick the shoulders down away from the ear, and keep the elbows tight (close) to the body, approximately 30° -45° from the torso, as illustrated in Figure 2.
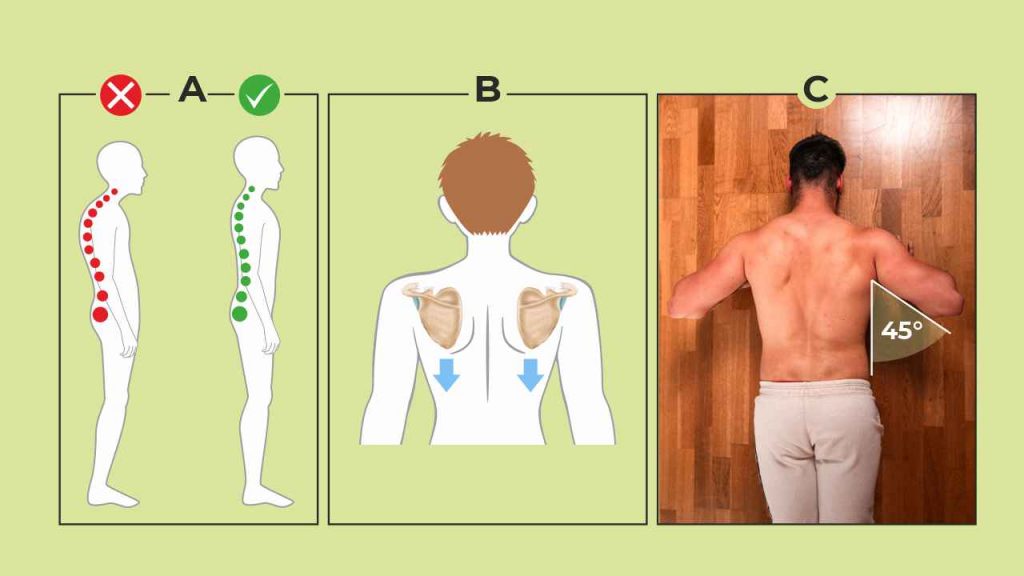
Figure 2. During push/pull movements, a neutral spine position (A) is desirable, while the shoulders should be depressed (B), and the elbows should remain tight to the body (approximately 30° -45°) (C)
2. Hinge
Hinging is an extremely important movement pattern and will preserve the lower back when performed correctly. Bending over/ forward to pick something up off the floor is a very common daily activity, and this action is often performed poorly. The hamstrings and gluteal muscles commonly remain inactive, and the lower back often takes the brunt of the loading.
Hinging with correct form is also required in many strength training exercises, such as deadlift, barbell hyperextension, straight-leg dumbbell deadlift, kettlebell swing, power clean, and more.
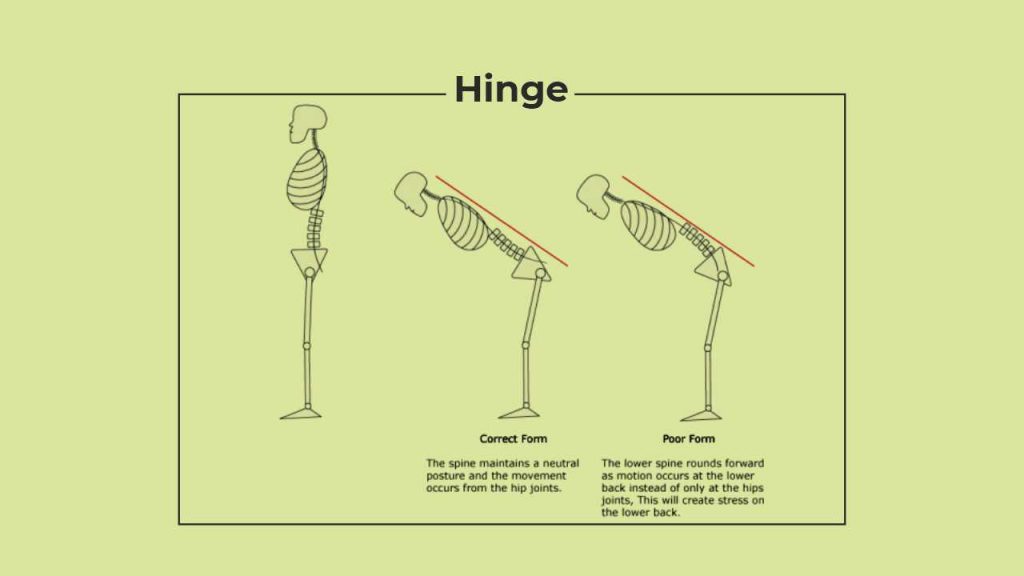
Figure 3 breaks down the hinge motion and lists the key joints and muscles involved.
| Muscles | 1. Prime movers: Gluteals (gluteus maximum), Hamstrings 2. Erector spinae (lower back), adductors, and quadriceps muscles will act as stabilizers |
| Joints | Hip flexion and extension |
Figure 3. Hinging key muscles and joint actions
To master the hinge technique, perform it in this sequence:
- Begin with the legs, hip-width apart and slightly turned out
- Bend the knees slightly; they should be softened
- Place a wooden dowel on the back; the dowel should touch the back of the head, the middle of the back, and the lower back
- Start the hinge by tilting the chest forward towards the ground without rounding the lower back, as shown above in Figure 3
- Observe yourself; you may feel tension/ slight stretching build in the hamstrings. Once the tension is felt in the hamstrings, pause the movement for two to three seconds.
- Contract the glutes and push the hips forward and upward to reverse the movement until you are back to the starting position
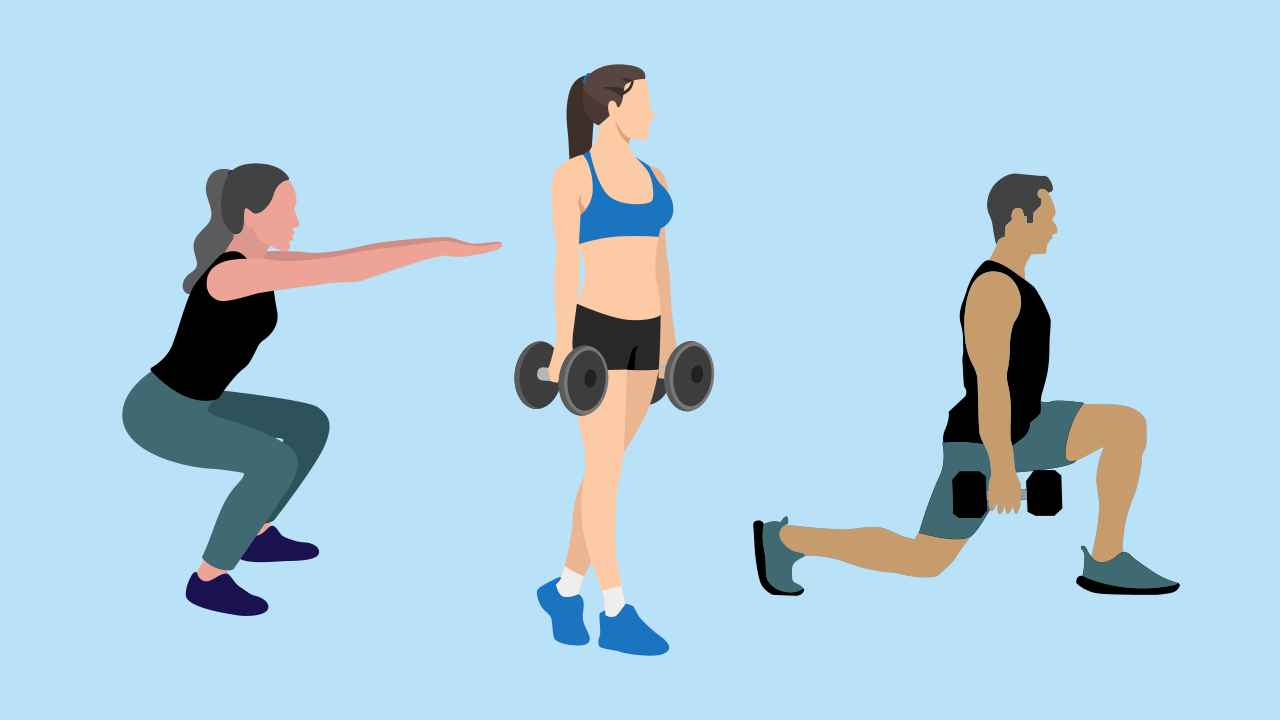
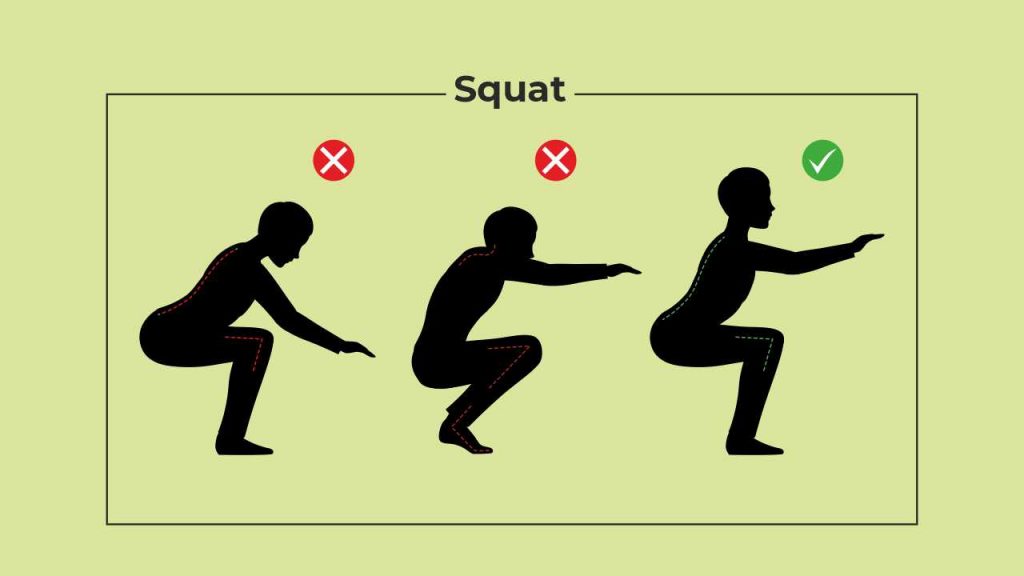
3. Squat
Getting off a chair or toilet, or in and out of a car, are daily tasks that require squatting. A squat includes triple extension and flexion joint actions, whereby the ankle, knee, and hips flex or extend in sequence to allow for the movement to occur. In this case, flexing refers to the joint spaces closing, while extension refers to the opposite (joint spaces opening). Figure 4 breaks down the squat motion and lists the key joints and muscles involved.
| Muscles | 1. Prime movers: Gluteals (gluteus maximum), Quadriceps 2. Erector spinae (lower back), adductors, and hamstrings act as secondary movers/stabilizers |
| Joints | 1. Hip flexion, knee flexion, and ankle dorsiflexion (eccentric/ downward motion) 2. Hip extension, knee extension, and ankle plantarflexion (concentric/ upward motion) |
Figure 4. Squat motion: Key muscles and joint actions
To master the squat technique, you need to perform these technical sequences:
- Have a natural stance width ie, slightly wider than shoulder-width, and foot positioning with toes should be slightly pointed outward
- Ensure unrestricted movement of the knees, wherein the heels remain in contact with the floor
- Gaze forwards or upwards
- Attempt for full depth; aim for anywhere between 115°–125° of knee flexion
- Maintain the spine in a neutral position
- Make sure that there is an appropriate alignment of the lower leg during the squat, with the knees tracking over the toes, and no knee valgus ie, knees turning in
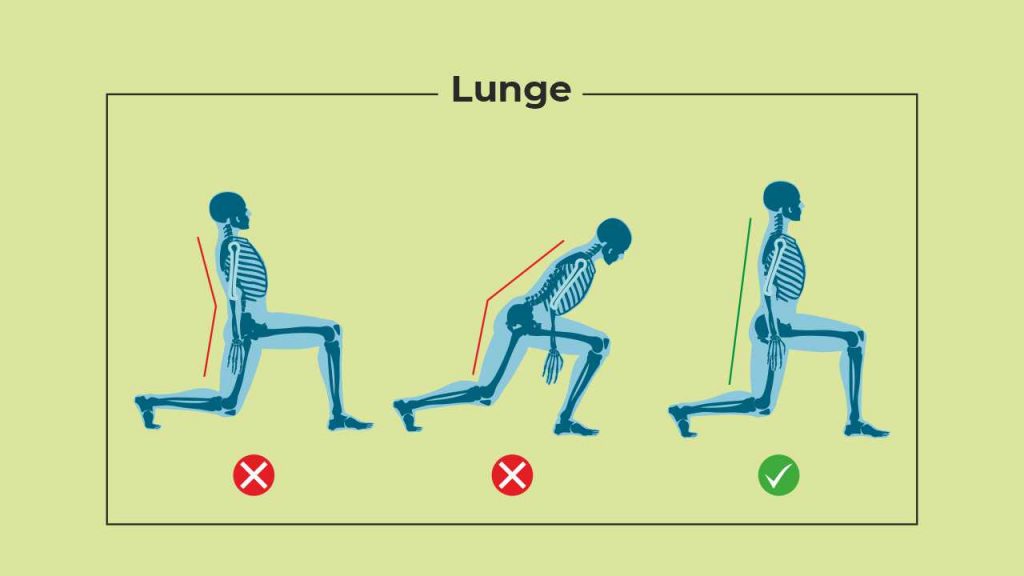
4. Lunge
The lunge is a multi-joint, functional exercise that targets the large lower body muscle groups. The core (abdominal) muscles are also used for stability, which can help maintain balance and prevent injuries. The hip flexors are stretched, improving their flexibility and counteracting the shortening and tightening that can happen when you sit for long periods.
Figure 5 breaks down the lunge motion and lists the key joints and muscles involved.
| Muscles | 1. Prime movers: Gluteals (gluteus maximum), Quadriceps 2. Erector spinae (lower back), adductors, calves, and hamstrings act as secondary movers/stabilizers |
| Joints | 1. Hip flexion, knee flexion, and ankle dorsiflexion (eccentric/ downward motion) 2. Hip extension, knee extension, and ankle plantar flexion (concentric/ upward motion) |
Figure 5. Lunge key muscles and joint actions
To master the lunge technique, perform these technical sequences:
- Stand in a split stance with the right foot forward and the left leg back
- Ensure that the feet are 2ft-3ft apart; the distance will depend on the length of your legs. The split stance will require balance; so, if needed, hold onto a wall or chair to maintain balance.
- Make sure the torso is upright, as explained in Table 4 and weight is evenly distributed between the front and back foot before lunging
- Bend the knees and lower the body down until the back knee is a few inches from the floor
- Ensure that the front thigh is parallel to the floor and the back knee should point toward the floor at the bottom of the movement. The weight should still be evenly distributed between both legs.
- Align your hips horizontally and keep your front foot/ ankle in line with the front knee
- Keep the front shin perpendicular to the floor; avoid shooting the front shin forward over the toes
- Push back up, keeping the weight in the heel of the front foot
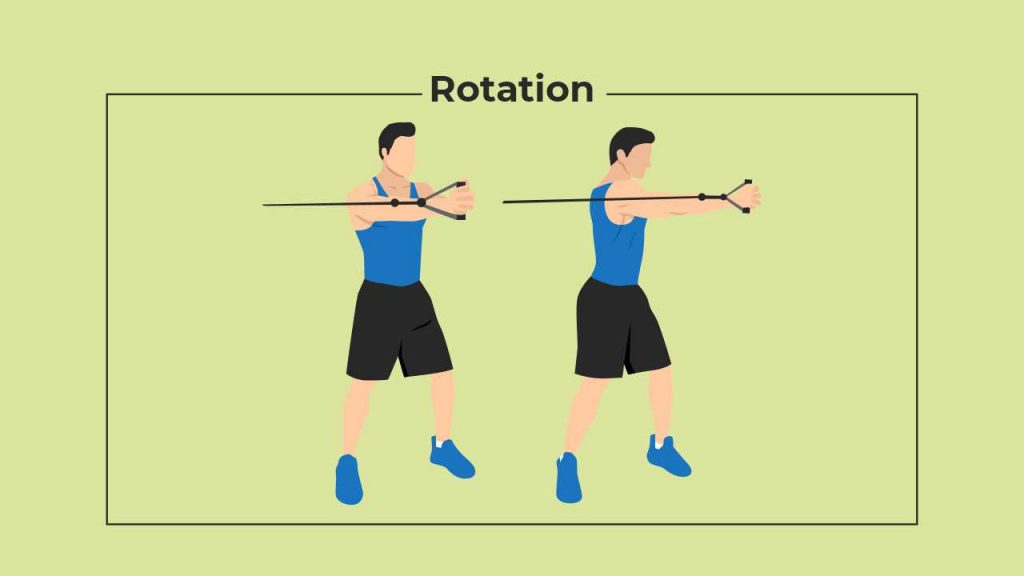
5. Rotation
Rotating the torso is a very common movement in day-to-day activities and during various athletic movements. One of the best examples of rotation is throwing a ball, which requires energy transfer from the ground through the legs into the core and eventually into the arms for releasing the object. If the core is unable to act as a conjugate between the legs and arms, meaning if it is unable to rotate effectively, then energy is lost.
Figure 6 breaks down the rotation motion and lists the key joints and muscles involved.
| Muscles | A combination of spinal stabilizers and mobilizers assists in this movement. These include: 1. Obliques 2. Rectus abdominis 3. Transverse abdominis 4. Glutes 5. Quadriceps 6. Erector spinae muscles 7. Quadratus lumborum |
| Joints | Lumbo-pelvic (sacral) junction |
Figure 6. Rotation: Key muscles and joint actions
You can perform rotation exercises on the ground by sitting in a half-kneeling position or kneeling on both knees or standing in a parallel stance or staggered stance. In addition, common equipment used for rotation exercises include cable pulleys, elastic bands, and medicine balls.
To master the rotation technique, you need to:
- Maintain a neutral spine, which is the straight back position
- Keep your head upright
- Control the implement and begin by rotating the torso with the arms either held straight out or with the implement remaining close to the body, wherein you are hugging the medicine ball close to the chest
- Count for three seconds and then slowly return to the starting position
- Do not allow the weight of the implement to dictate the motion. For example, if the weight is too heavy, the rotation action will be very difficult, and returning to the start position will be even more challenging.
Now that you have understood the trick to mastering different fundamental movements, follow this guide to witness effective results after exercising.
References
1. Comfort P, McMahon J.J., Suchomel TJ. Optimizing Squat Technique—Revisited. Strength Cond J 2018; 40: 68-74.
2. Myer GD, Kushner AM, Brent JL, et al. The back squat: A proposed assessment of functional deficits and technical factors that limit performance. Strength Cond J 2014; 36: 4.
3. Kushner AM, Brent, JL, Schoenfeld BJ et al. The Back Squat Part 2: Targeted Training Techniques to Correct Functional Deficits and Technical Factors that Limit Performance. Strength Cond J 2015; 37: 13-60.
4. Tyson A. (2001). “Hip-Hinge” to a Healthy Back. Strength Cond J 2001; 23: 74.
5. Kritz M., Cronin J., Hume P. Screening the Upper-body Push and Pull Patterns Using Body Weight Exercises. Strength Cond J 2010; 32: 72-82.
6. Kritz M., Cronin J., Hume P. Using the body weight forward lunge to screen an athlete’s lunge pattern. Strength Cond J 2009; 31: 15-24.
Recommended